by Martha Rettalick, WIR Contributor
Do you like to sit and watch flowers grow? This planter bench helps you do both. This is what I like to call a ‘weekend’ project, especially if you’re a beginner.
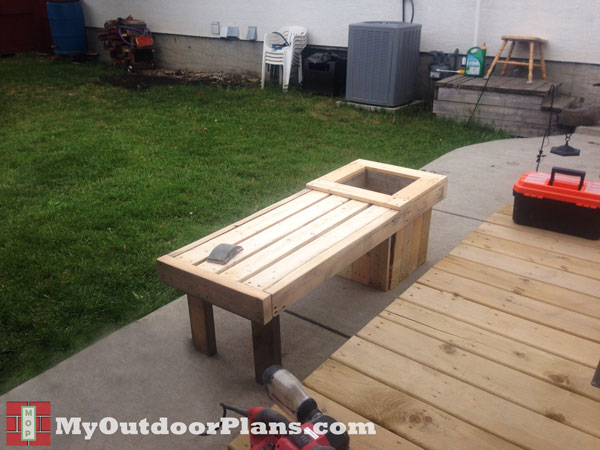
Lovely wood planter bench. Just add flowers. Image courtesy MyOutdoorPlans.com
Before we get started with the building, here’s a Southern Yellow Pine buying tip:
Since your planter is going to live outdoors, construct it with pressure-treated lumber. It’s treated to take just about anything that Mother Nature dishes out.
We also recommend that you select Ground Contact pressure-treated lumber for any part that will have direct contact with the soil. For the rest of the planter, Above Ground lumber will do just fine.
Now, let’s tackle this project
Note that the instructions start with a lumber list. Print it out or pull it up on your phone when you head to the building supply store – the salespeople will need it to fill your order. If you don’t have the tools for cutting wood, the store will probably be able do that for you.
To complete this project, you’ll also need 2 1/2” galvanized screws, waterproof glue, putty, and sandpaper. If you want to finish your bench, add paint or stain to this list. Need to know how much of each item to purchase? Ask at the store. Take the plans with you, and be prepared for lots of helpful advice.
Time to Assemble
This involves a lot of “screwing and gluing” – and checking your work. When the plans tell you to verify that your corners are right-angled, use a try square.
Then it’s on to the bench legs. They’ll need a crossbar between them. You’ll join these pieces with screws sunk into pocket holes. They’ll also be used for attaching the legs to the bench frame.
Check out the step by step instructions below. And click the following link to download and print the supply list and how-to: Planter_Bench_WoodItsReal.

You may be wondering what pocket holes are, so here’s an explanation:
Ever driven a nail at an angle through one piece of wood and into another? Carpenters call it toenailing, and it’s often used in structural framing. Pocket holes are the same concept applied to drilling and screwing.
You’ll get the best results with a special drill bit and pocket hole jig. Ask at the building supplies store – they may rent this equipment. Or try a tool rental center. See this video to learn more about pocket holes.:
Tip: If creating pocket holes is new to you, practice makes perfect! Build your skills on scrap lumber before trying them on your bench project.
After you’ve attached the seat slats and the trim, you may want to add finishing touches like covering the screw holes with putty, and painting or staining. Be sure that you’re using a coating product that is compatible with SYP. Need advice? Ask at the store or do a search on this site.
You’ll also want to smooth out your surface. Splinters are no fun. Sand the surface with 120-grit sandpaper while wearing a dust mask or respirator. This minimizes your exposure to wood dust.
Finally, get that big pot full of posies and put it in the planter. Grab yourself a book and a cup of coffee, and give yourself a pat on the back.
Did you build this project? Do you have questions? Let us know by emailing here.


