HANDMADE HOLIDAY
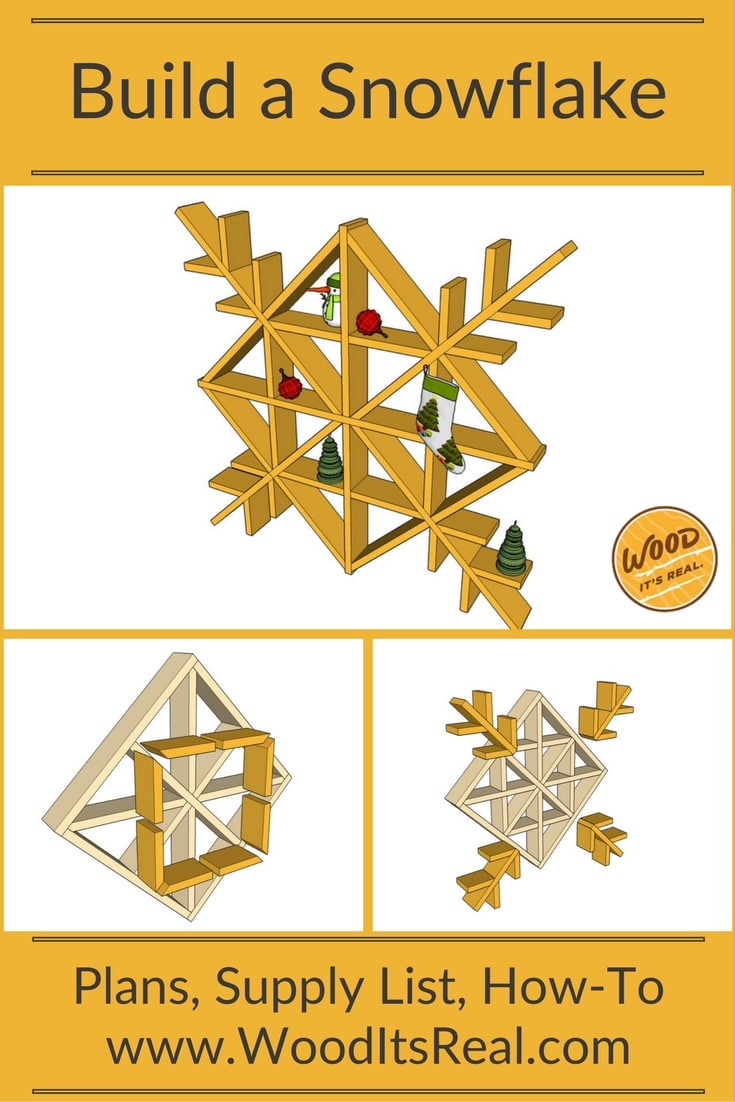
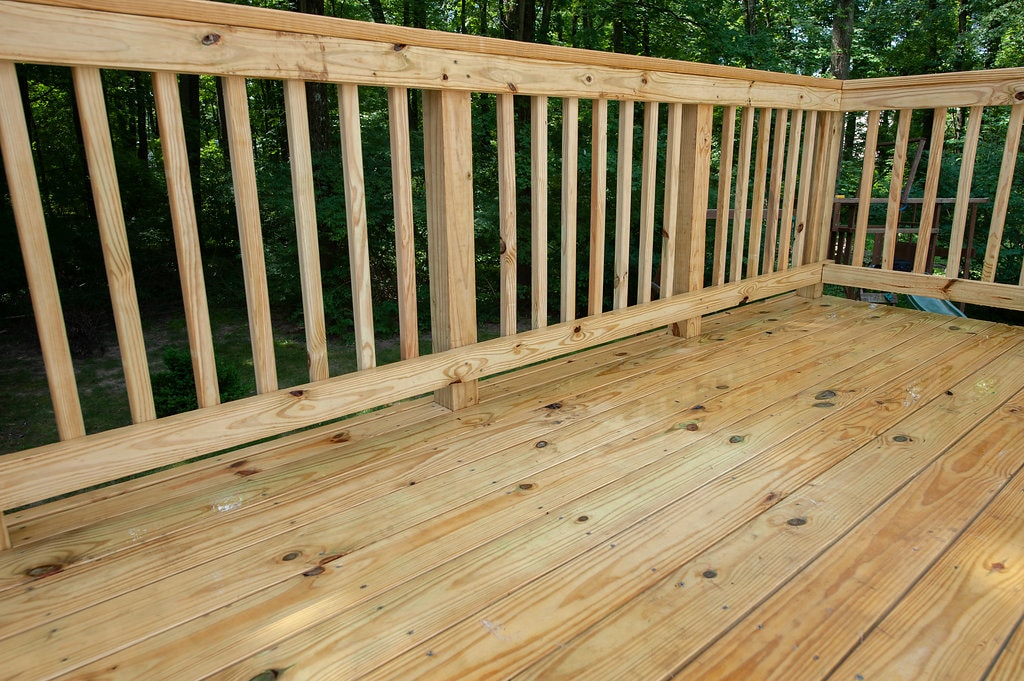
Here’s a way to bring something extra to your winter decor: build a simple, yet stunning snowflake. Keeping with the simple theme: The main material used here is decking boards. You’ll only need to pick up five boards, which makes this project super affordable, too. The good news about using decking boards is that they’re already treated for outdoor use. That means you can build this project and it will withstand the elements, even if the weather outside is frightful.
You can really go wild here painting, staining, or decorating the snowflake. Or you can leave it as is to show off the beautiful wood grain. No matter what, your project – much like a snowflake – will be unique. That’s because each board of lumber is different, made by nature.
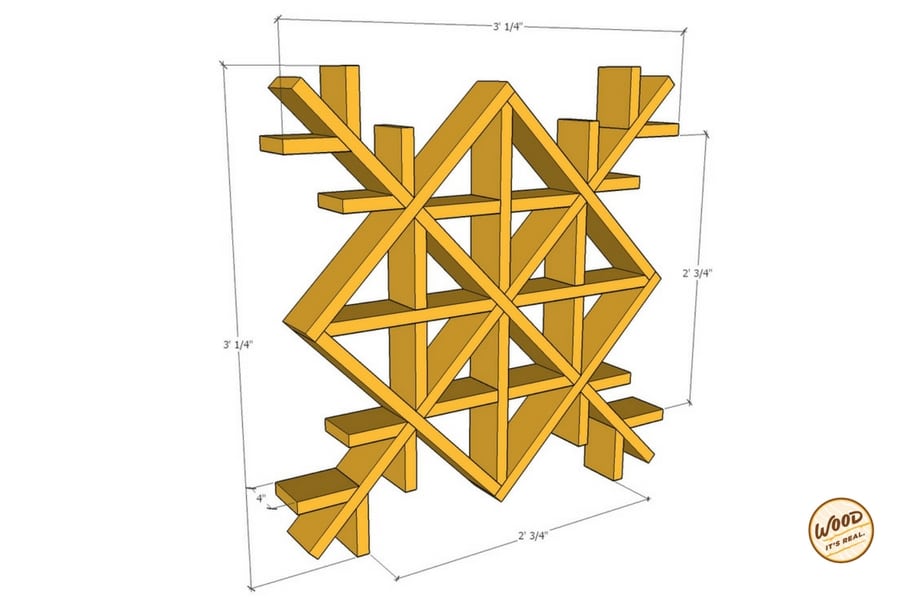
Something we want to point out here is that this project is made up of multiple sub-assemblies. Those are then pieced together with nails and wood glue. The thing that will take the longest here is waiting for glue to dry as you construct each sub-assembly. You’ll see what we mean below.
Once you’ve made this project, let us know how it went. We’d love to see it and brag about you, OK?
Check out the step-by-step instructions below, or you can print out a cut list and overview of the build here: wooditsreal.wpengine.com-Build It Let It Snowflake
IT’S SNOWFLAKE BUILDING TIME
We recommend getting the following supplies:
MATERIALS
Lumber
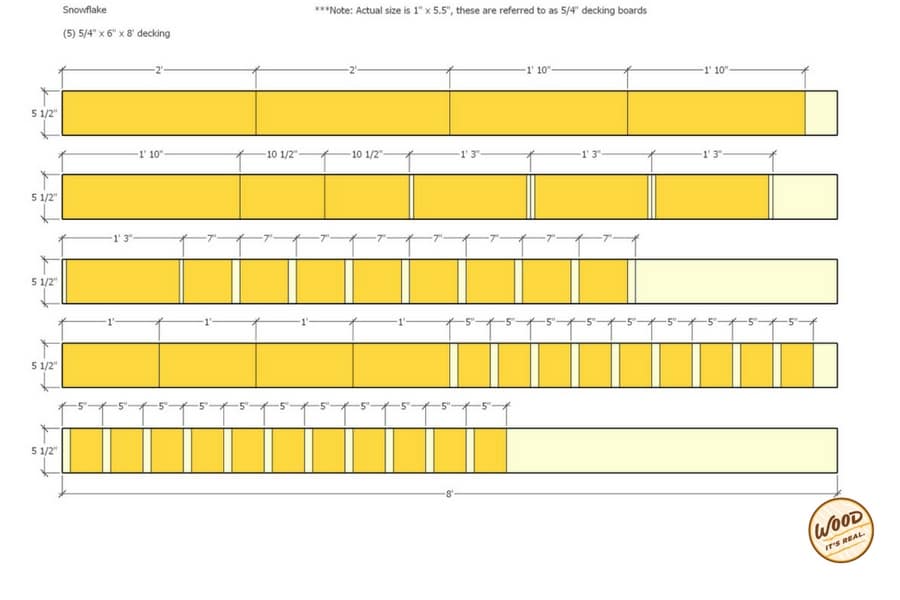
• (5) 5/4″ x 6″ x 8′ Decking Boards
Other
• 16 or 18-gauge 1″-1.5″ nails for nail gun
• Wood glue
• (Optional) L or T Straps with screws
TOOLS
• Pencil, Measuring Tape
• Miter Saw or Miter Box
• Nail Gun
• (Optional – if using L or T Straps) Screwdriver/Electric Drill
• Safety Glasses / Ear Protection
• Dust Mask / Work Gloves

Without further ado, here we go with the cut list. Follow these cuts for your DIY Southern Yellow Pine Decking Board Snowflake:
 AND NOW, FOR THE FUN PART: PUTTING YOUR SOUTHERN YELLOW PINE SNOWFLAKE TOGETHER.
Step 1: Build the Base Square
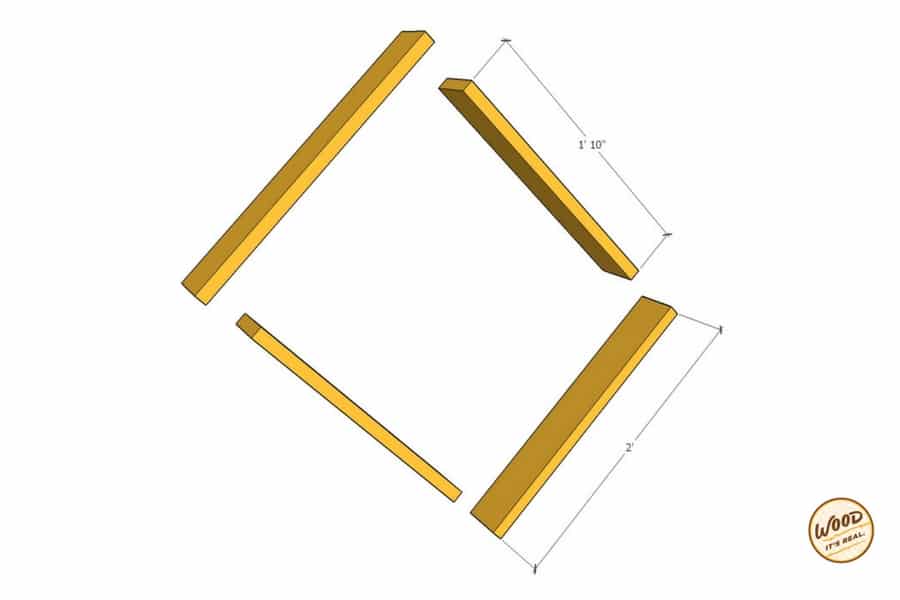
- Cut a total of four lengths: (2) 1’10” and (2) 2′.
- Wood glue the ends and nail together, creating a square.
Step 2: Cut and Attach Cross Board
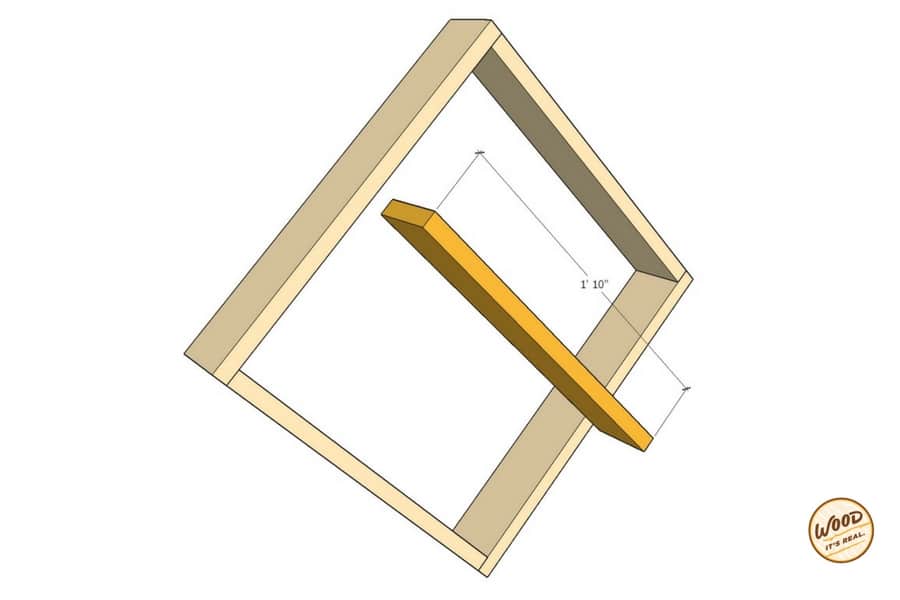
- Cut one length: 1’10”.
- Wood glue the ends and slide into the middle of the square, 10.5″ from the inside edge. Nail in place.
Step 3: Cut and Attach Center Boards
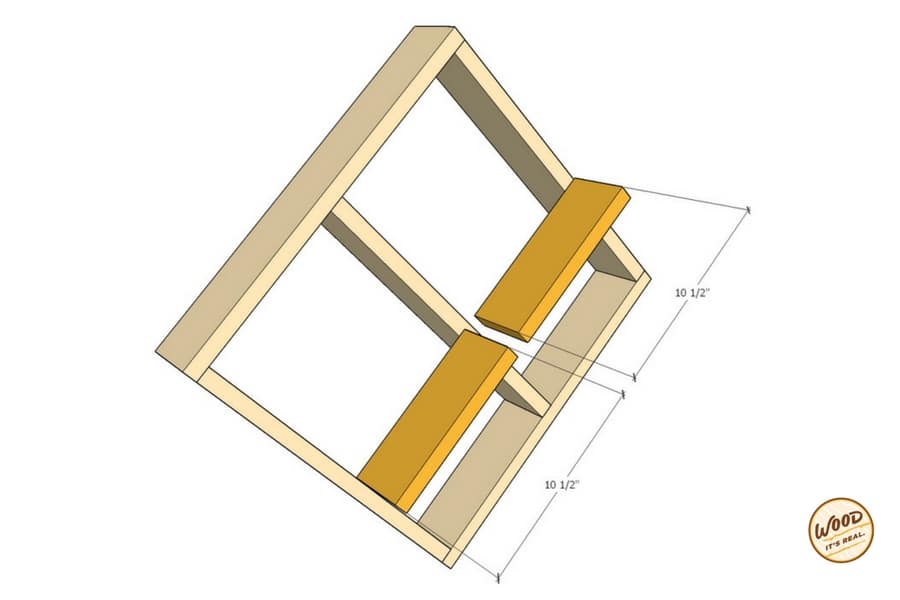
- Cut two length at 10.5″ each
- Wood glue the ends and slide into the square, 10.5″ from the inside edge. Nail in place.
Step 4: Cut Interior Diagonal Pieces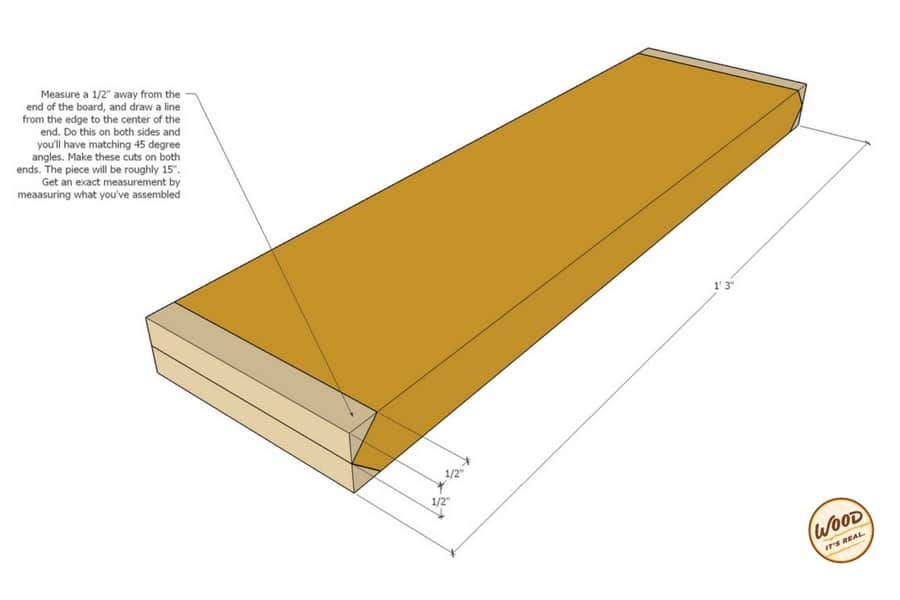
- Cut 4 lengths at 1’3″ each. However, it’s a good idea to get an exact measurement by measuring what you’ve assembled. See the next step to find out where these cuts will go.
- Measure 1/2″ away from the end of the board and draw a line from the edge of the center of the end. Do this on both sides and you’ll have matching 45″ angles.
- Make these cuts on both ends.
Step 5: Attach Interior Diagonal Pieces

Step 6: Cut Boards for Interior Square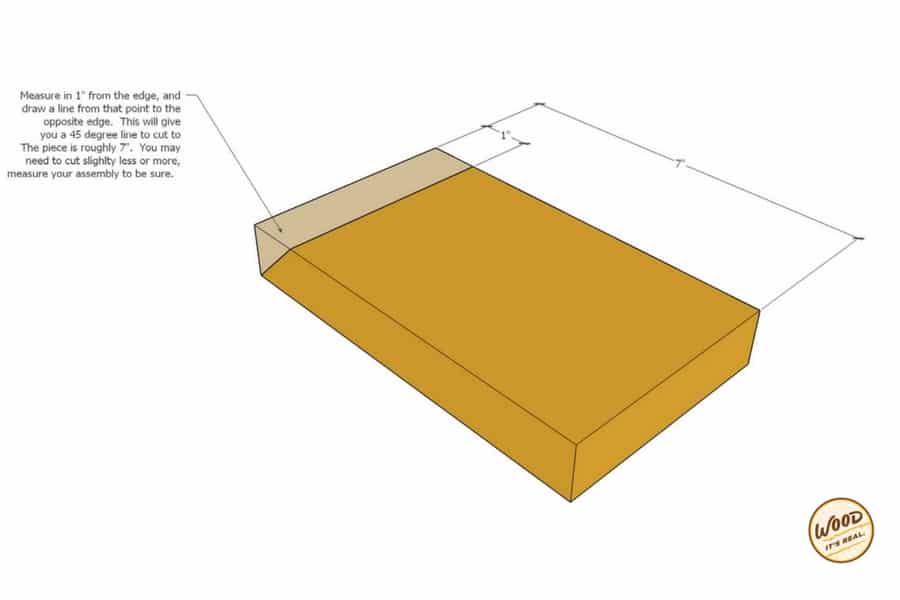
- Cut eight 7″ pieces. You may need to cut slightly more or slightly less. Measure your assembly to be sure.
- Measure in 1″ from the edge and draw a line from that point to the opposite edge. This will give you a 45-degree line on one end of the piece.
Step 7: Attach Interior Square Pieces
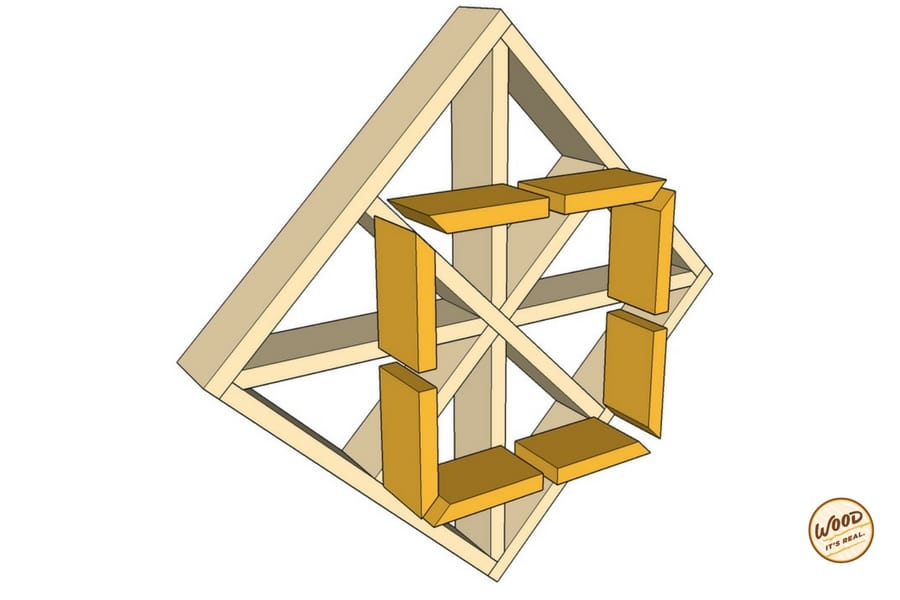
- Wood glue the ends and slide into the square.
- Nail in place.
Step 8: Build Exterior Snowflake Assemblies
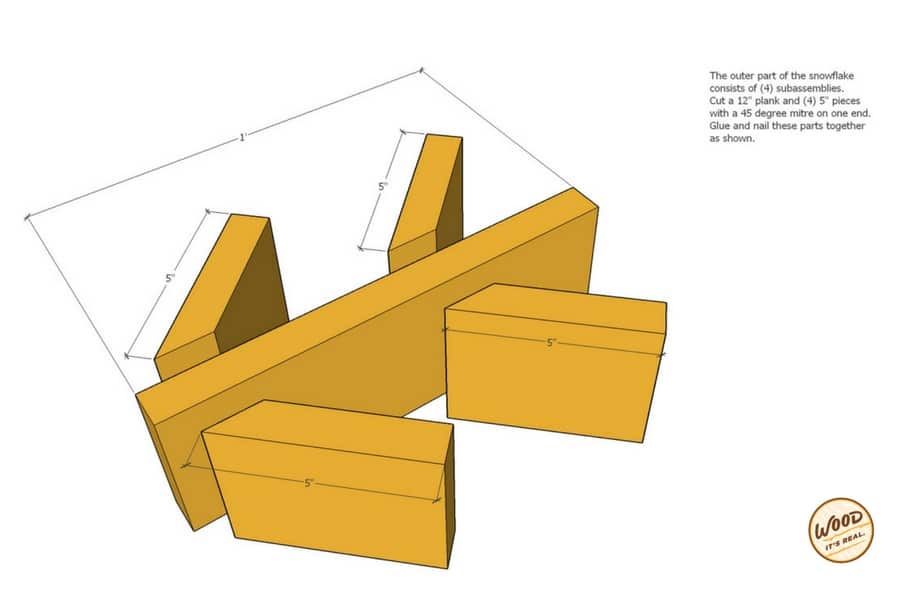
- The outer part of the snowflake consists of (4) subassemblies. Start by cutting four 12″ pieces.
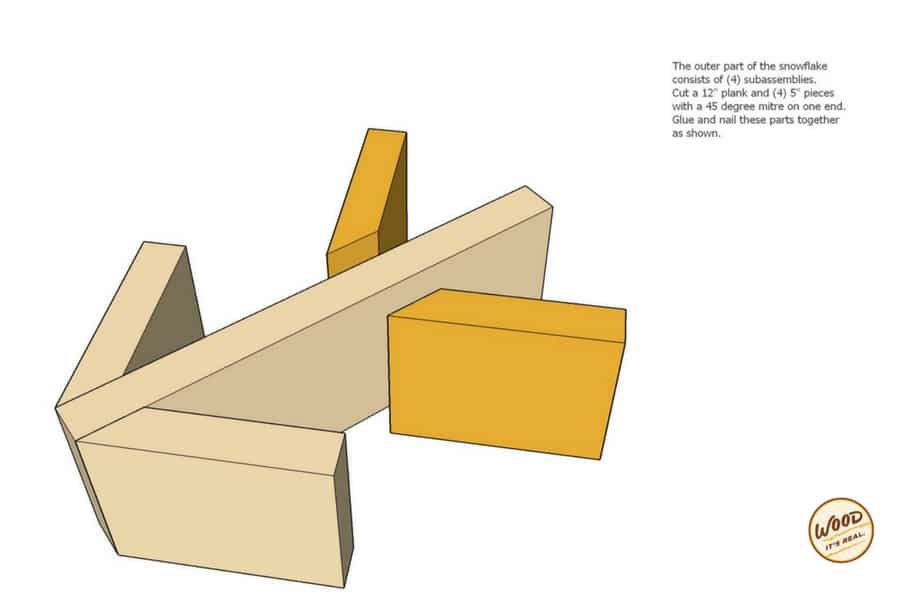
2. Cut four 5″ pieces with a 45-degree miter cut on one end.
3. Glue and nail the bottom pieces.
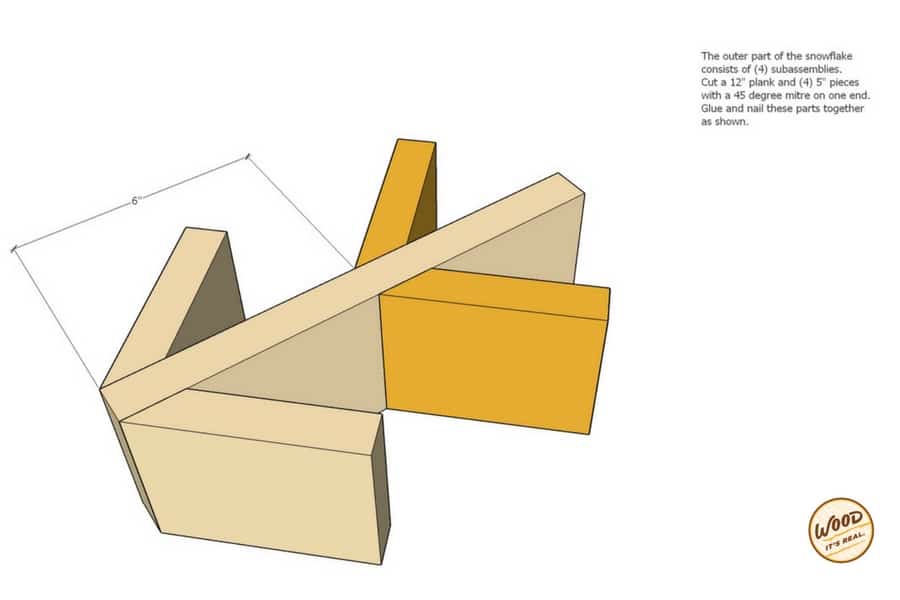
4. Measure 6″ from the end of the board and mark the halfway point.
5. Align the bottom of the 5″ long piece with the mark and glue/nail in place.
Step 9: Attach Exterior Snowflake Subassemblies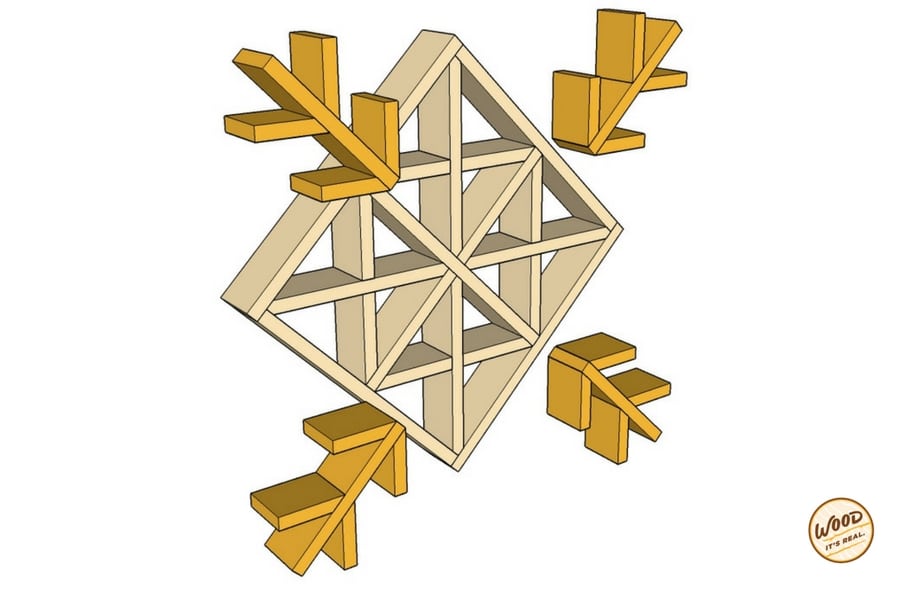
1. Glue and nail exterior snowflake assemblies.
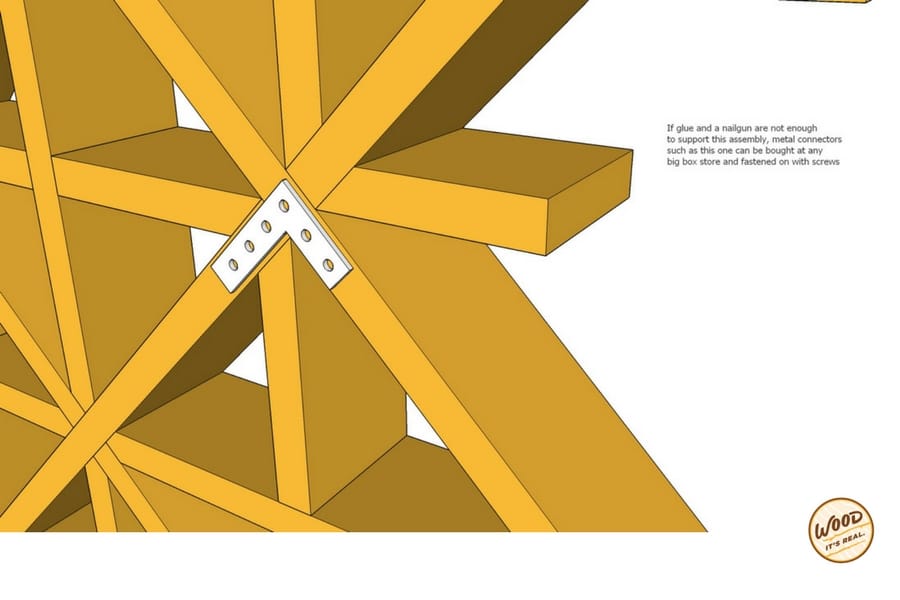
2. If you want a little more stability for the assembly, you can screw in metal L straps or T straps to the back of your snowflake.
Step 10: Let It Snow, Let It Snow, Let It Snow
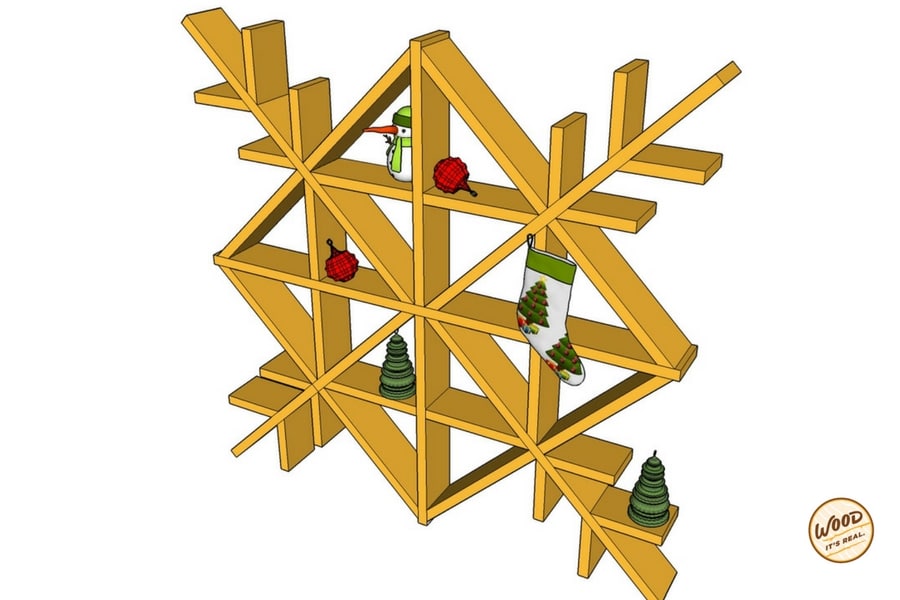
Give yourself a pat on the back. You’ve built yourself a fun and festive project that can be enjoyed for years to come, inside or out. How did it go? Let us know!

