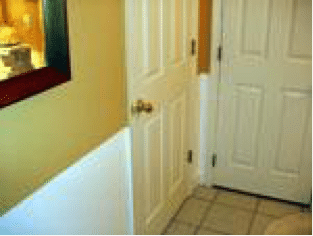
Before: The small guest bathroom needed something to separate the upper and lower portions of the walls to create a more spacious feeling.
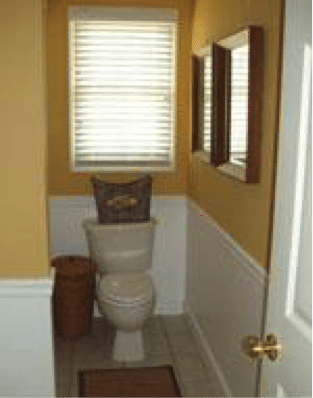
After: Southern Yellow Pine moulding makes the small bathroom feel more spacious by creating the illusion of higher ceilings.
When Jett and Leslie moved into their new house, the first order of business was brightening up the guest bath. Plain-Jane white cabinets and very ordinary white fixtures caused the white walls to blend in with the rest of the room, making the room appear small and cramped.
After painting the top half of the wall a rich Tuscan gold, Jett and Leslie decided to create an easy, beautiful visual break by adding a chair rail moulding about 30″ off the floor. “We chose finger-jointed, primed Southern pine because it is so strong and doesn’t warp or twist. It doesn’t show any knot holes either. We live in a humid climate and Southern pine isn’t affected by moisture,” said Jett.
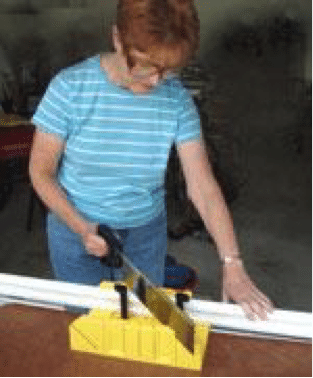
After carefully measuring for the moulding, cut to specification using a miter box.
And the results? “We love the way it looks,” said Leslie. “It was an easy weekend project and it just changed the entire look of the room.”
Steps:
- Measure the space to be covered by the moulding. Measure it again.
- Purchase a little extra moulding to allow for cutting mistakes.
- Using a miter box, have a partner hold the long pieces of moulding in place while you saw. Remember: “Measure twice, cut once!”
- Hand mitering might not produce perfect angles, so have wood filler, sand paper and paintable caulk on hand to fix the corners.
- Squeeze a ribbon of liquid adhesive on the back of the rail and press it into position against the wall. This helps the rail stay in place and gives you two hands to nail it to the wall.

Once the Southern Pine moulding has been cut and painted, nail it in place.
Materials and Tools List:
| Miter box
Hammer Stud finder (optional) Paintbrush GM9 pine chair rail Tube Liquid Nails Wood filler 4D 1 ½ nails Paint brush Stud finder Battery for finder Safety glasses
|
|