By Meghan Banke, WIR Contributor
Chairs are a necessary accessory to backyards and outdoor spaces. We take them for granted since they are needed for practical reasons. We’ve all enjoyed nights around a dining table in the backyard, eating an al fresco meal under the stars. Or lounging around with friends on the weekend on the back deck. Scattering chairs around the lawn or pool deck for people to sit and gather adds so much personality and intimacy to an outdoor setting. Yes, chairs can go overlooked when decorating your deck or picking out lawn adornments, but are a necessity to making an outdoor space comfortable and inviting.
 We are here to inspire you to make your outdoor space not only beautiful but practical. Skip the trip to the store to buy those generic (and can we say ugly and boring?) plastic chairs that so many people have. Yes, they are easy and cheap, but that’s not the look you are going for, is it?
Building your own chairs will allow you to have exactly what you want and will be more unique and authentic, inviting and even a conversation piece. Custom means you can make the perfect chair to match exactly the decor you have.
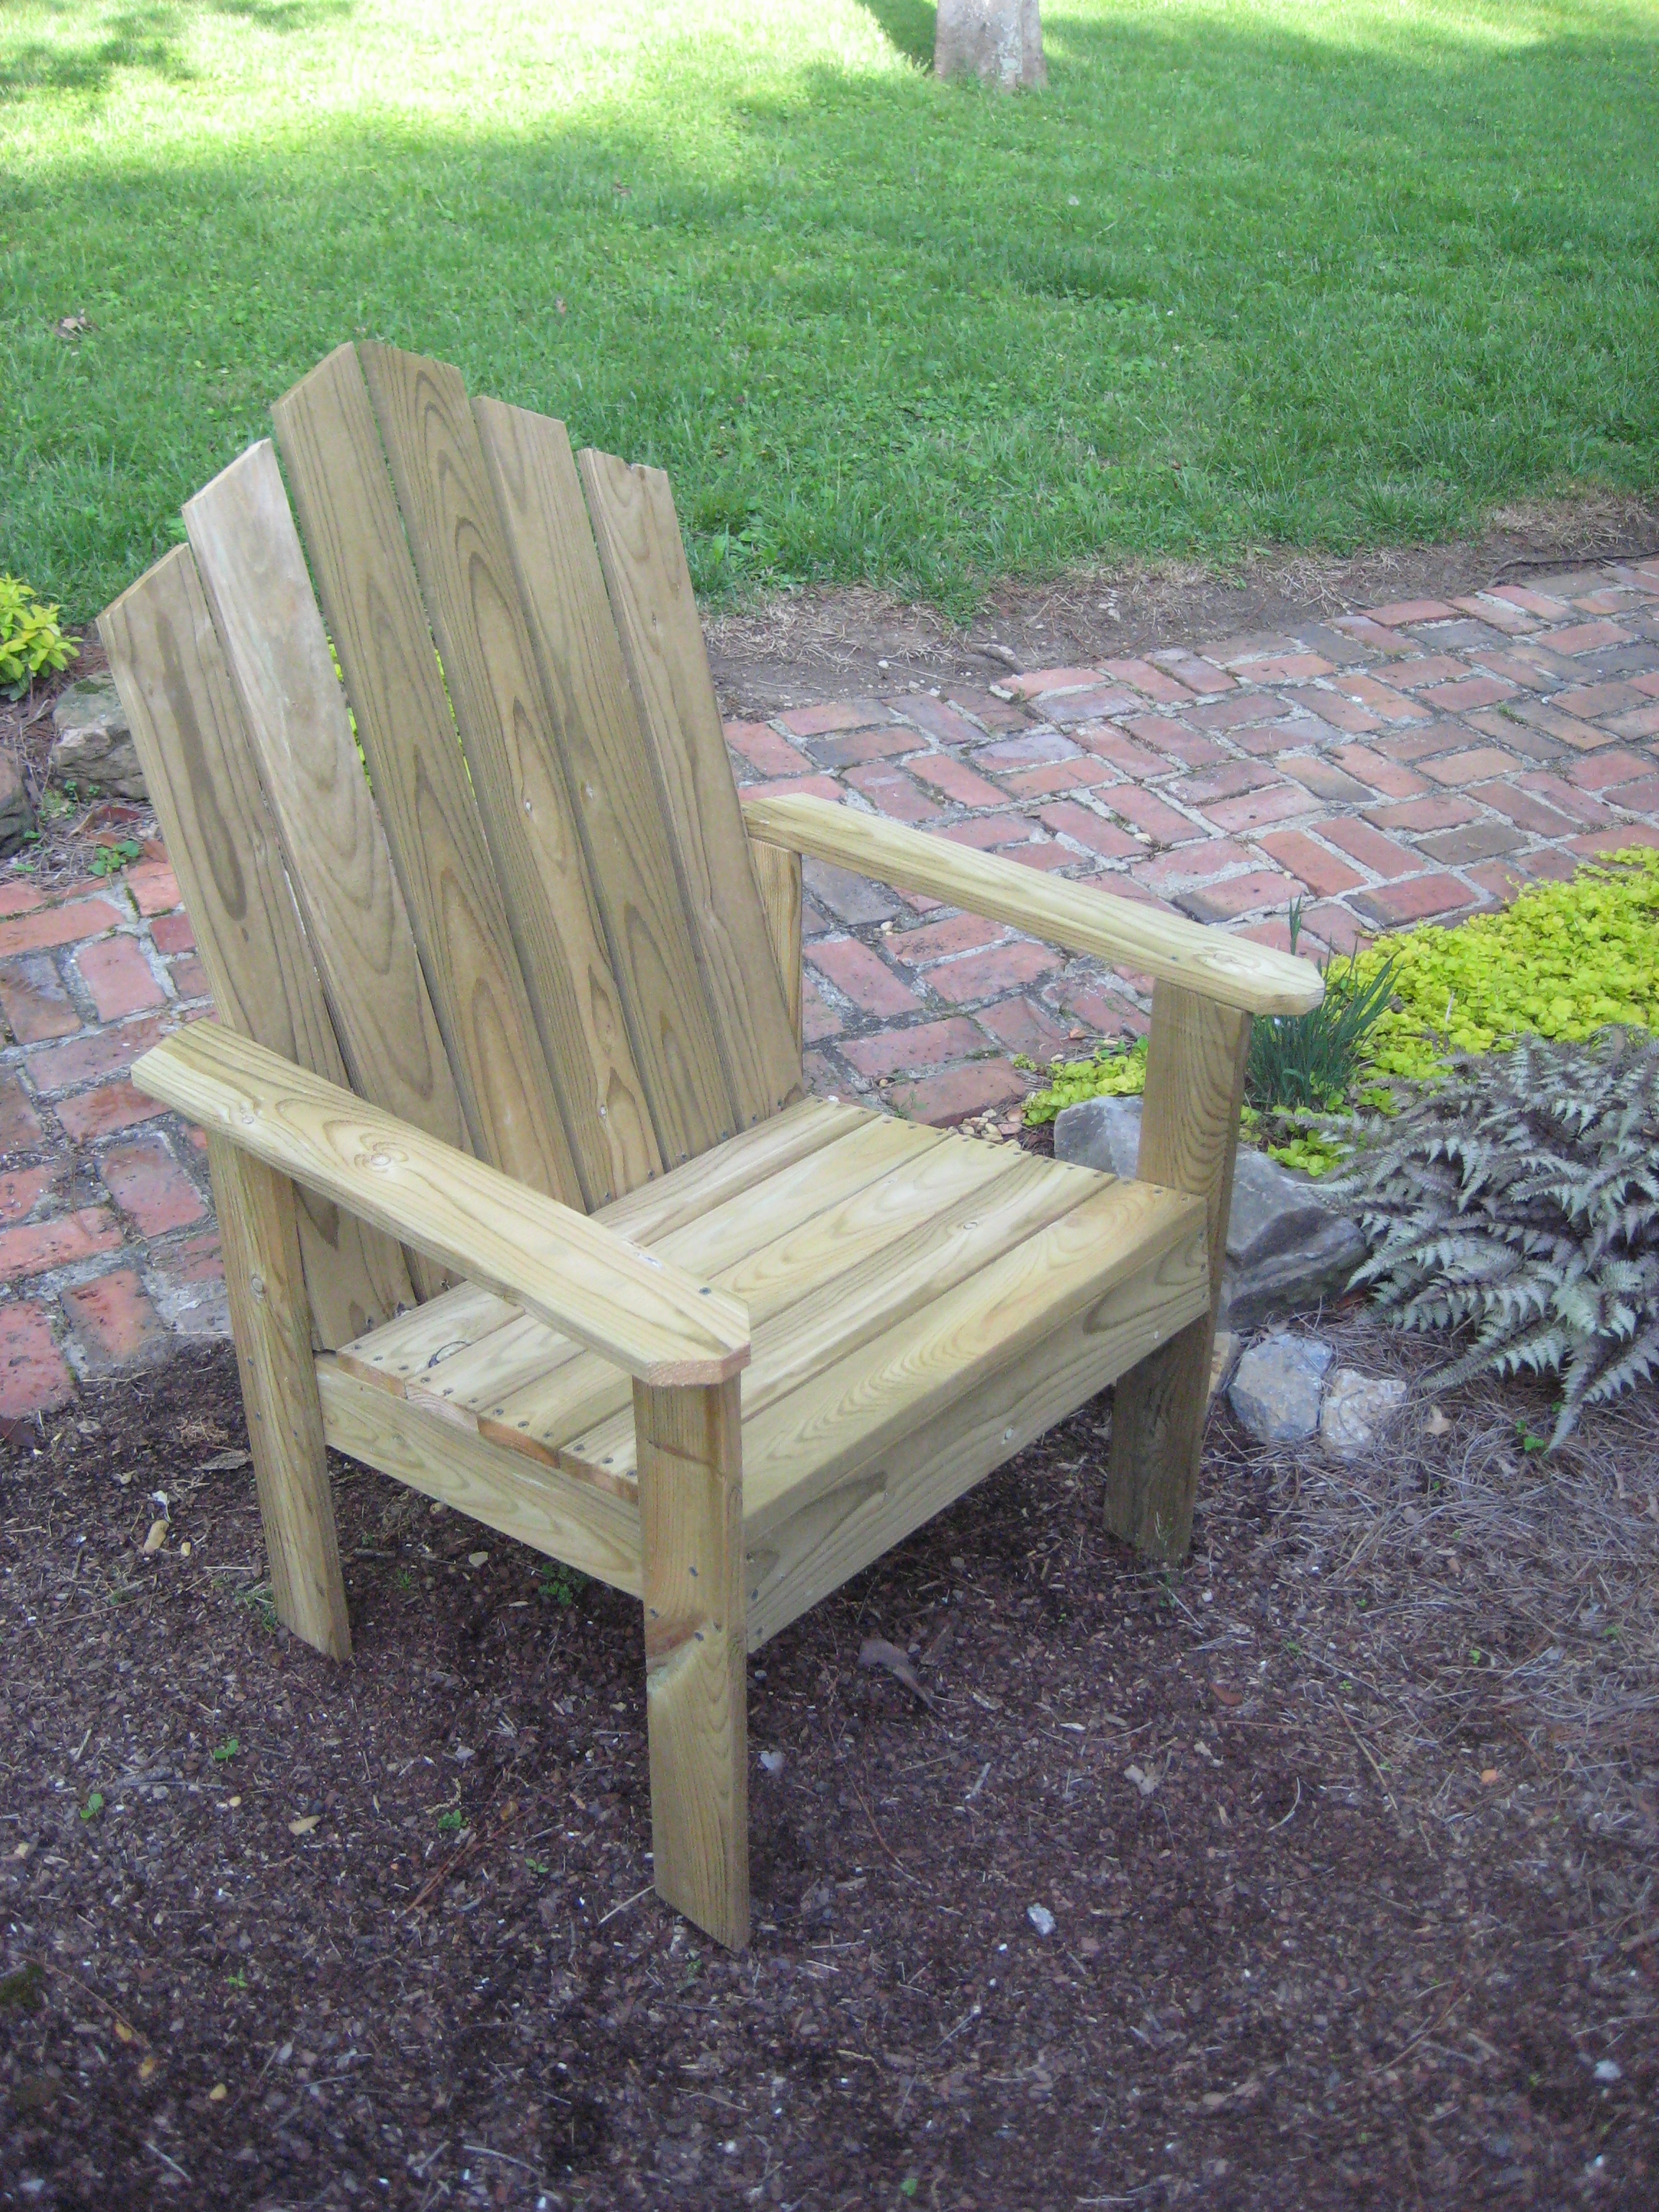
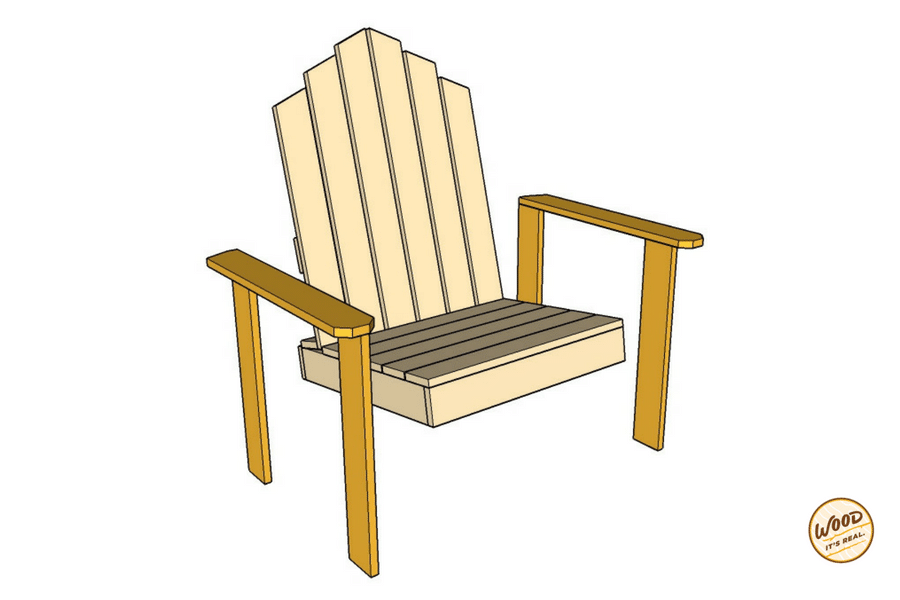
The Chattahoochee Chair is a great style for a backyard. They are similar looking to Adirondack chairs, but where the back of the Chattahoochee Chair sits more upright. This makes the chair more usable and comfortable. They’re also more unique, an understated style that looks good along any grassy lawn or outdoor space.
Once you’ve made this project, let us know how it went. We’d love to see it and brag on you, OK?
Check out the step-by-step instructions below, or you can print out a cut list and overview of the build here: Chattahoochee Chair Building Plans.
IT’S CHATTAHOOCHEE CHAIR BUILDING TIME
As you get started, here’s a handy video that takes you through all the steps to make your Chattahoochee Chair.
We recommend getting the following supplies:
MATERIALS
Lumber
- (7) 1″x4″x8′ Pressure Treated Southern Yellow Pine boards
Other
- Metal brackets (can be any size but a 2″ x 2″ would be enough without being too much)
- Exterior Grade Deck Screws, #8 x 1 1/4″ and 1 1/2″
- Wood Glue
- 1/8″ Roundover bit (but a block of wood and sandpaper could do this with a little elbow grease)
- 150 grit sandpaper
TOOLS
- Pencil, Measuring Tape
- Circular Saw
- Hand Saw
- Electric Drill / Driver
- 1/8″ Roundover bit (but a block of wood and sandpaper could do this with a little elbow grease)
- Radial Sander / Sanding Block
- Safety Glasses / Ear Protection
- Dust Mask / Work Gloves
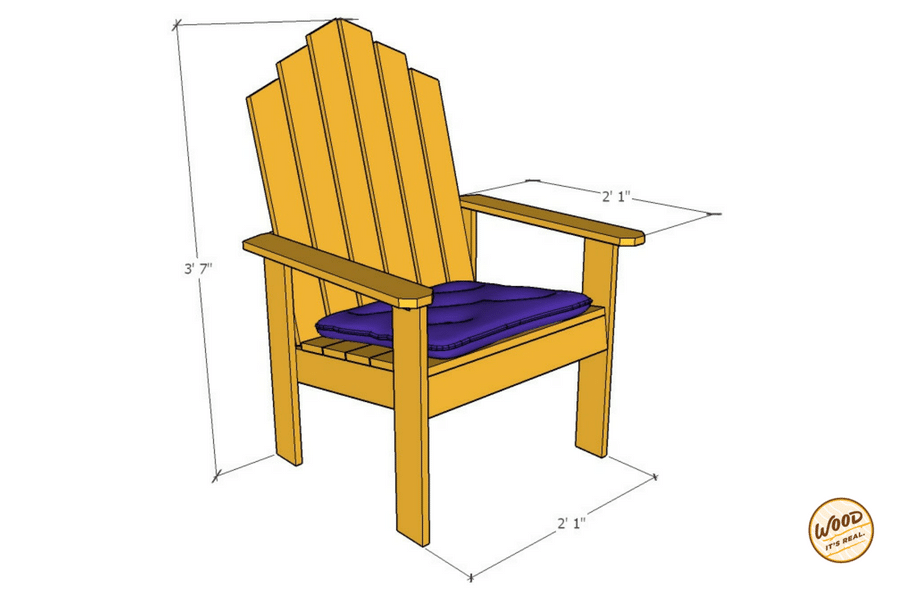
OVERALL DIMENSIONS OF THE CHATTAHOOCHEE CHAIR
Note: If you don’t own a saw or don’t feel comfortable with cutting the wood yourself, your local hardware store can help. Just check first with the store’s guidelines to make sure they can cut to the dimensions you need.
CUT LIST
It can be a good idea to cut off the factory edges of your lumber by running it through a table saw for a super smooth edge, just be careful not to take off too much. See the how-to video to see what we mean.
With your board prepped, follow these cuts for your Chattahoochee Chair:
And now, it’s time to put your Chattahoochee Chair together.
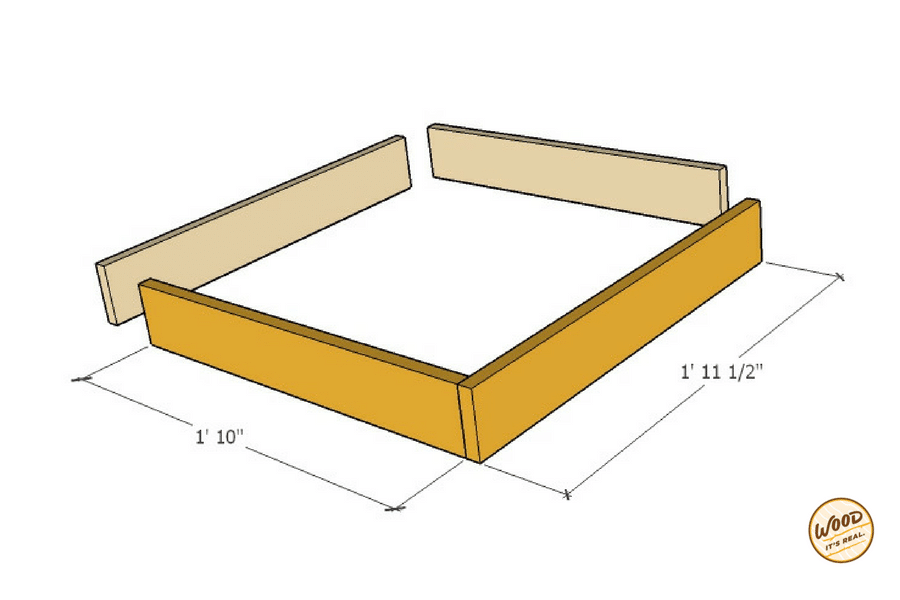
STEP 1: Build the Bottom Frame
- Cut 2 boards at 22” and 2 more boards at 23 ½” and smooth the edges. Arrange into a rectangle.
- Put in 3 screws at each corner to secure it.
- Fastener Locations: Measure ⅜ in. from the edge of a board, then mark half an inch from each side and one in the center (3 holes in a row). Drill divots, don’t go all the way through the wood, just create a slight crater
Step 2: Cut Seat Boards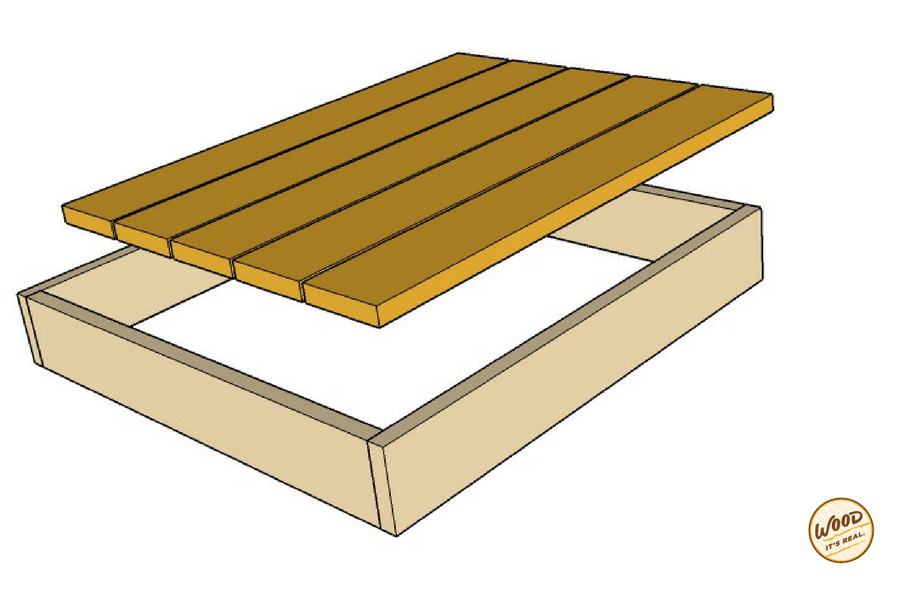
- Cut 5 more boards to 23 ½” and make sure the edges are smooth.
- Now drill pilot and countersink holes.
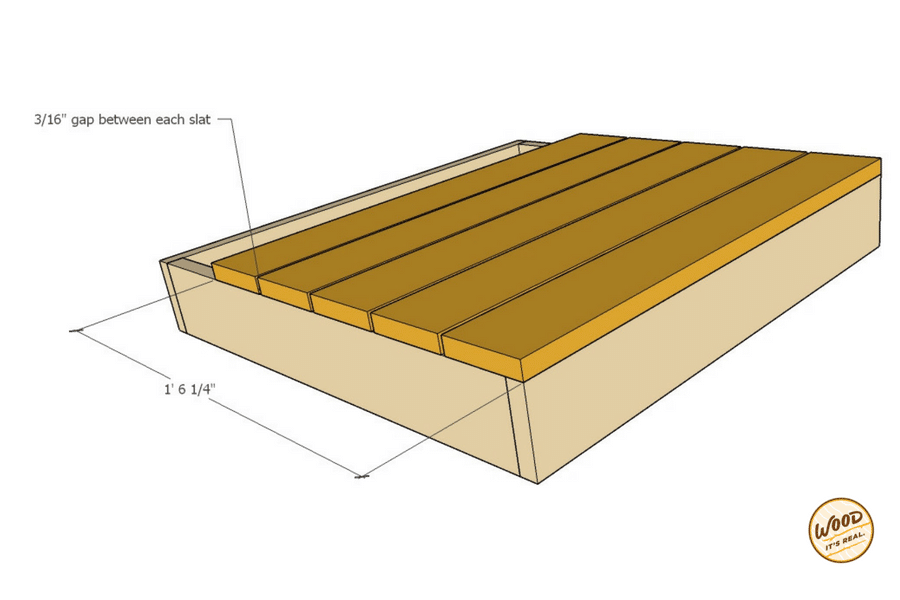
Step 3: Place and Attach Seat Boards
- At the back of the frame, mark 4 ½” on each side. You’ll leave that much space open for the back part of the chair to go. Then you’ll put the rear slat in.
- The rest of the slat’s will follow accordingly, make sure to space them apart evenly, leaving enough room for water to drip through (for when it rains).
- Then screw or nail seat slats on.
Step 4: Making the Seat Back
- Made of 6 lengths: 2 at 31 ¾”, 2 at 29 ¼”, 2 at 26 ¾”.
- Make a pattern: On a scrap piece of lumber, use a speed square and line it up against the edge, and pivot to the 22 degree mark, then cut with a circular saw.
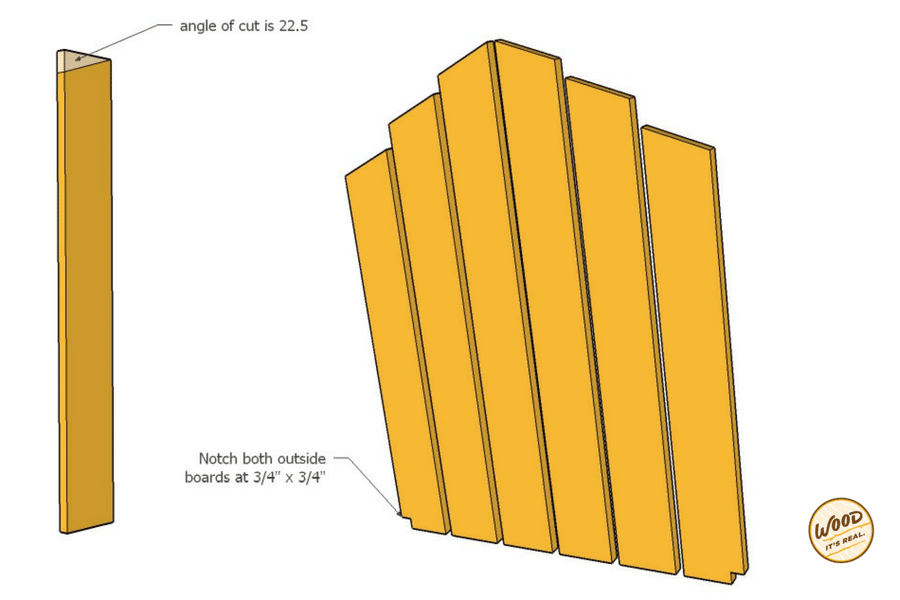
- Now trace that angled line on to each of the slats you’ll be using for the back of the chair. Then cut them out with the saw. Once cut, smooth with sandpaper.
- Now you have to cut two more pieces of wood for this back piece: 2 pieces that are 23 ½” and 1 piece at 22”.
Step 5: Brace the Seat Back and Attach to Seat Bottom
- Take one of the longer pieces to brace across the middle. Measure up 12” from the bottom and draw a line across. Don’t screw/nail in the brace board in just yet, but space the back boards evenly apart.
- Once you have the board spaced where you want them, drill the screws in an offset pattern to keep the boards aligned, as in don’t just go in a straight line. Center together to 2 remaining braces and nail them together.
- Now measure ¾” squares at the bottom of the back and cut them out. (The outer corners of the outside slates on each side). Now place the back onto the top of the two nailed braces and align them upright. Nail in place.
Step 6: Build Seat Legs
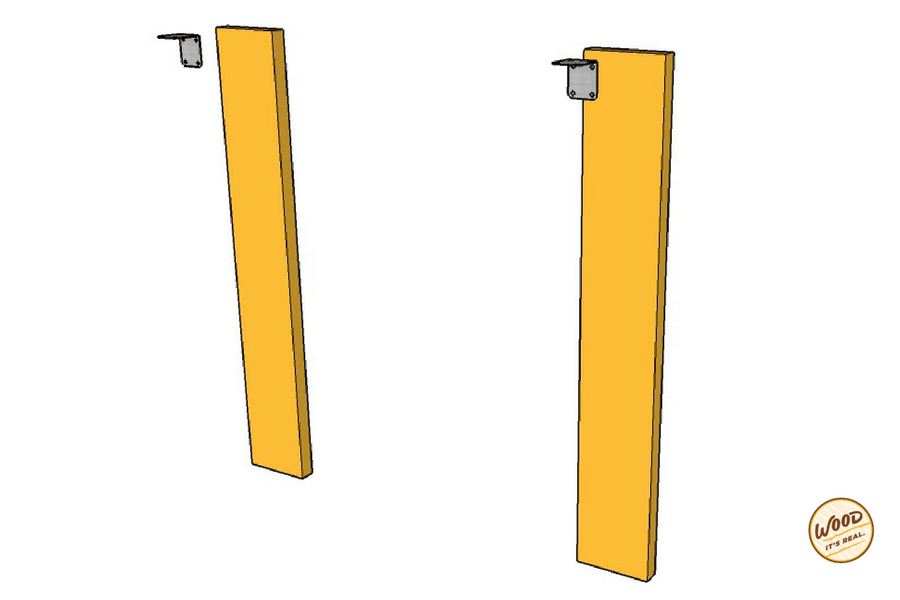
- Cut 4 legs at 22 ¾” and 2 arms at 25”.
- Attach a L bracket to the top of each leg. At the front of each arm, cut off each corner at a 45 degree angle (purely aesthetic).
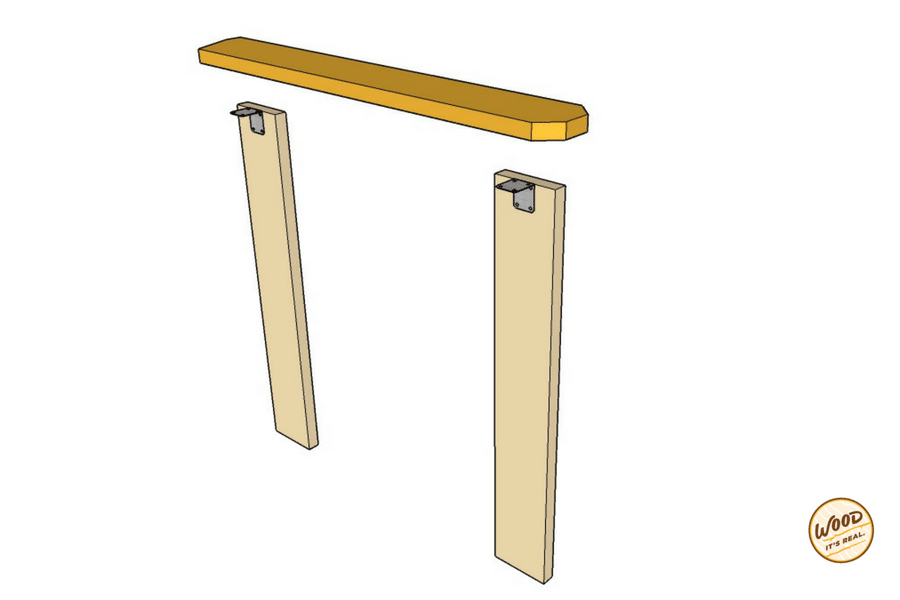
Step 7: Cut and Attach Armrests
- At the front of each arm, cut off each corner at a 45 degree angle (purely aesthetic).On the back of the arm, measure in 1”, make a mark, then take the 22 degree pattern and line up with 1” mark.
- Once cuts have been made, lay out two of the legs with an arm on top. Attach the brackets with ½” screws. Do this twice (do this for the other arm and leg set as well).
Step 8: Assemble Legs, Back, and Seat
- You can tweak these measurements, but suggested for assembly: front leg: measured up 12” – made a mark, back leg: measured up 9” – made a mark. Gives the chair an angle.
- Attach with screws and do to the other side.
- Attach the back of the chair: the best tilt is when the back meets with the back leg: hold and add screws.
Take a bow. Now take a seat. That’s all there is to it.
Next: stain it. Paint it. Customize it.
Did you build it? What did you think? Let us know: howdy@wooditsreal.wpengine.com.
(Plan courtesy of Wolmanized Residential Outdoor Wood)

