A DIY Loveseat for Valentine’s Day (or any day)
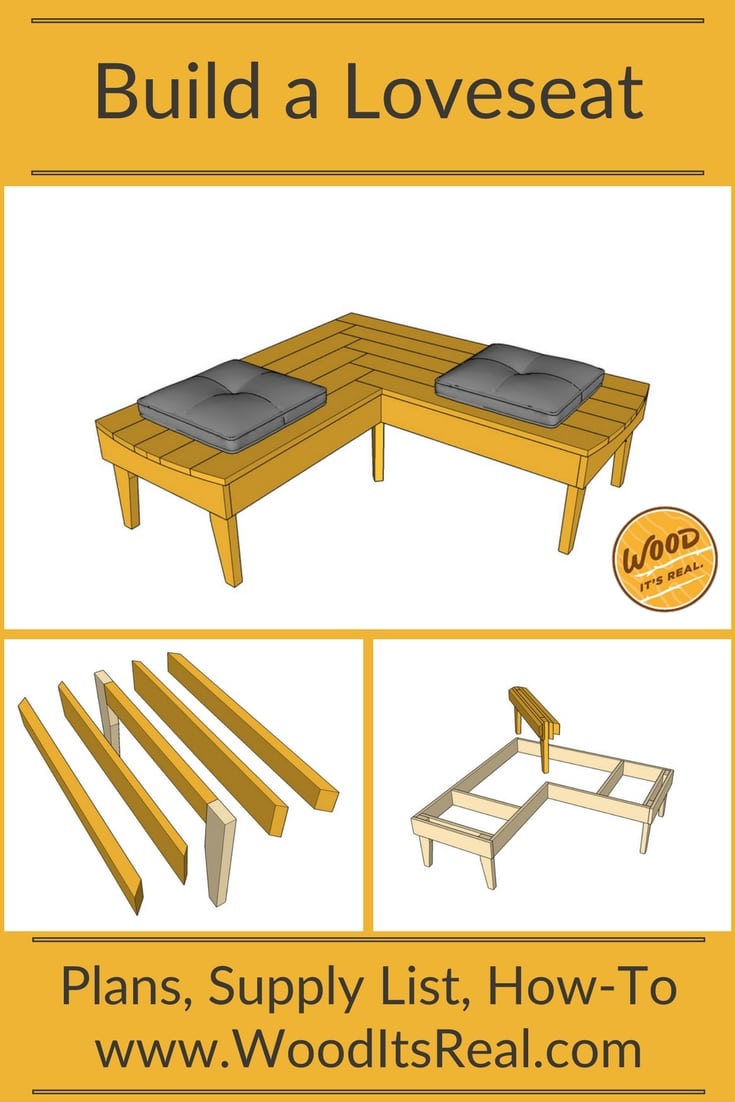
For Valentine’s Day, we came up with a weekend project built with decking boards and 2×4’s: a Love Seat. Get it?
It’s a great bench style for instigating communication because folks are led to face each other in a more intimate way. This sort of coercion made us think about how Valentine’s Day reminds us to take a moment and pay attention to our loved ones, or our first dates, or whatever.
It’s a simple project and you don’t need to be a master woodworker to build it. The loveseat bench only has a couple of miter cuts, and the rest is right angles.Lastly, the herringbone pattern on the seat is super easy to layout, and it kind of reminded us of hand-holding, another Valentine’s Day nod.
You could also call this project a “First Date Bench or a “Conversation Bench.” We modernized the legs a bit and threw a subtle arc on the sides to soften it all up.
Once you’ve made this project, let us know how it went. We’d love to see it and brag on you, OK?
Check out the step-by-step instructions below, or you can print out a cut list and overview of the build here: Build A Lovely Loveseat Downloadable Printout
It’s Loveseat Building Time
We recommend getting the following supplies:
MATERIALS
Lumber
• (12) 5/4″ x 6″ x 8′ Pressure Treated Southern Yellow Pine aka SYP Decking Boards
• (3) 2″ x 4″x 8′ Pressure Treated Southern Yellow Pine
Other
• Exterior Grade Wood Glue
• 1.75″ or 2″ Wood Deck Screws (20+)
• 3″ to 3.5″ Wood Deck Screws (8+)
• Appropriate Bit for Deck Screws
TOOLS
• Pencil, Measuring Tape
• Table Saw
• Straight Edge / Carpenter Square
• Mitre Saw or Mitre Box with Handheld Saw
• Jig Saw (optional)
• Electric Drill
• 2-4 Clamps
• Radial Sander / Sanding Block
• Mitre Saw (optional)
• Protractor or Ruler
• Safety Glasses / Ear Protection
• Dust Mask / Work Gloves
OVERALL DIMENSIONS OF THE LOVESEAT
CUT LIST
Follow these cuts for your DIY loveseat:

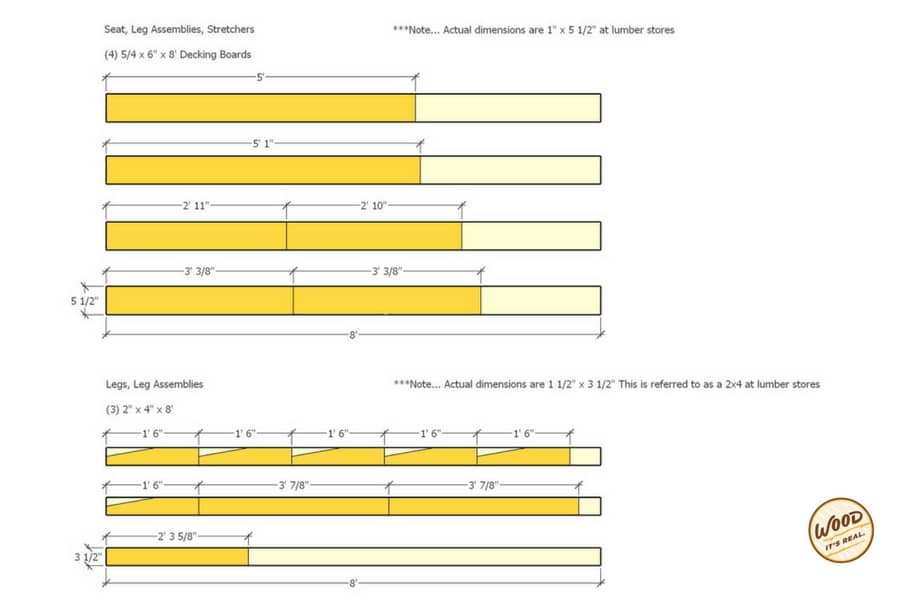
And now, for the fun part: putting your garden bench together.
Step 1: Measure and Cut Bench Legs (Six Total)
- Grab your 2×4’s and measure/cut six pieces to lengths of 18″.
- Measure 1.75″ from the corner of one board and make a mark. Then measure 10″ up from the opposite corner of the board and make a mark. Use a straight edge to draw an angled line between the two marks.
- Cut the angle and you now have an angled seat leg.
- Repeat for the remaining 5 legs. Or you could use one leg as a template for the others.
Step 2: Cut and Build the End Assemblies
- Cut two 2’3″ lengths and two 2’1″ lengths.
- Wood glue the top part of the legs and clamp as illustrated here:

- Make sure the longer board overhangs 1″ on each side. Once boards are in place, screw the assemblies together from both the inside and outside of the assembly to make sure it’s sturdy.
Step 3: Cut and Attach the Right Frame
- Cut a 5’1″ length and a 2’11” length.
- Glue and screw the boards to the leg assembly. The boards will fit right inside the 1″ overhang of the leg assembly.
Step 4: Cut and Attach the Left Frame; Attach the Two Assemblies to Finalize the Frame
- Cut a 2’10” length and a 5′ length from your decking board.
- Glue and screw these pieces to the left leg assembly.
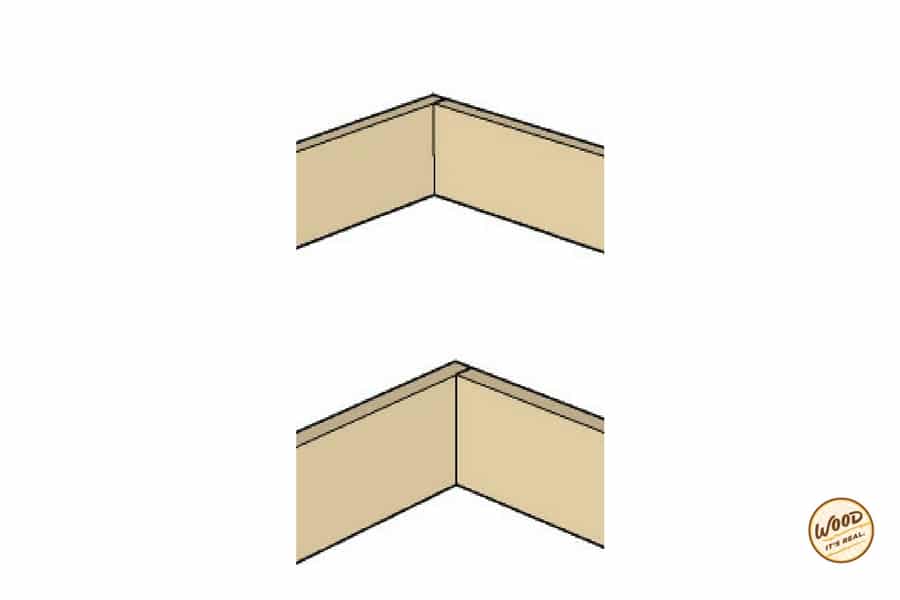
- Glue and screw the ends so they’re lined up like this:
Step 5: Cut and Attach Frame Supports
- Cut two 2’1″ pieces of decking board.
- Measure 1’6″ from the exterior edge of the frame and make a mark.
- Glue and screw the ribs in the front and back of the frame assembly.

Step 6: Cut Supports for Inner Leg Assembly
- Cut two lengths of 3′ 3/8″ from your decking board.
- Cut two lengths of 3′ 7’8″ from your 2×4.
- Using a miter saw or your handsaw with a miter box, cut 45-degree angles into both ends of all pieces as illustrated above.
Step 7: Build and Attach Interior Leg Assembly
- Cut a 2′ 3 5/8″ length from a 2×4.
- Wood glue and clamp the angled pieces from the previous step as illustrated here:

- Attach all of the boards together using your longest 3″-3 1/2″ decking screws.

- Insert the interior leg assembly into the corner of the frame.
- Wood glue and attach the interior leg assembly into the frame.
Step 8: Cut and Attach Seat Boards
- Now, it’s the fun part. It’s time to cut a bunch of straight lengths from your decking boards. Here are all the cuts and the layout:

- Glue and attach the seat boards. You will have a 1.5″ overhang on the ends and a 1/2″ overhang on the front. There will be no overhang on the back.

Step 9: Draw and Cut the Curved Ends
- Once the seat boards are glued and fastened, sketch out an arc using a large compass or just freehand.
- Cut the arc using a jigsaw.
- Clean up any marks or rough edges with 150 grit sandpaper.
Step 10: Love Your New Loveseat
- Give the bench a good sanding to clean up any rough edges.
- Grab a friend or your honey and love your new loveseat.
How did it go? We love pictures and questions, please send both our way.


